Tuesday, 30 April 2013

Honey is Cinderella - Part 2

Honey is a Cinderella

Part 2!

 
After putting together the main part of the outfit, the next thing to do is to start designing the skirt.
 
 
Honey's costume is 70cm wide. I made the fabric associated with the skirt double that so I can gather the material and give the skirt more oomph.
I also made it longer than it needed to be to allow for all the extra volume of skirt since its going to be standing out like a ballgown!
 
Before I could do anything else I did need to hem all around the satin skirt so it wouldn't fray and get tatty looking.


Depending on what I am doing I tend to allow between 0.5cm (5mm) and 1cm (10ml) for seams.
 
The key to getting the skirt to stand out from Honey is tulle!!!
 
 
Both tulle strips are 140cm wide and get gathered to around 60 cm.
Took this photo to show the difference with before and after gathering!
The pic also shows the two layers of stitching which are required for strength when gathering.
 
There is 5 cm of difference between the two strips in length.  The top strip(when attached) is the shorter to allow the skirt to stand out in a big ball.
 
 
All pinned up and ready to be sewn in place. 
 
 
The reason the tulle is getting sewn up towards the neck is to help it stand up more.  It will be folded back towards the tail and held down a bit by the weight of the satin.
 
 
The lower one was sewn on first and then the shorter, upper layer. 
 
Honey 'helping'.
 
Both layers of tulle are now on and standing up by themselves without a problem. 
They won't be quite as perky once the satins on, but with the amount of gathering in them they should retain the majority of their uprightness.
 
: )


Honey is Cinderella!

Honey is Cinderella

Part 1


My housewarming theme was Disney! I couldn't have a dressup party at home without the puppies getting involved!!!
 
Honey and Beau went as Cinderella and Prince Charming.


This was Honey's inspiration.  Blue with a full skirt and paler blue foofy bits on the hip. 
 
I decided to brave satin for this outfit despite how convenient and easy cotton was to work with.  What's a princess without a big shiny dress.
 
The basic outline of the outfit was quite quick and easy because I already had the pattern from Honey's fairy dress.  I trimmed the paper pattern down to match the adjustments I made in fitting the fairy dress so I didn't have to change the satin in case it was harder to work with. 
 
 
I was especially worried that the satin would be slippery while it was face to face for the main sewing so I had TONS of pins to make sure it didn't even wriggle! 
Whether it was the pins or just that satin was not as scary as it looked to sew, it was actually no harder than the cotton to work with. 
I believe part of it was that I was sewing two pieces of the same type of fabric together and another factor was the lack of stretch in the satin. 
 
Like with the other costumes, I sewed around the outside leaving a gap at the tail end to turn it out the right way.
 
 
I encountered a problem with the satin pulling in and bunching in the corners. 
 
 
My mum recommended turning the outfit inside out again and making little cuts in the corners, every 2 - 3 cm, stopping just short of the stiches.
If you look closely at the above picture you can just see the snippets. 

 
This above photo is after the cuts.  It is not perfect but is much improved!
 
After getting all the seams done I quickly added the velcro so Honey could try it on!  
 
 
Tested the fit and it is perfect! Loving the look of the satin! Its so smooth and shiny.
Very princessy!
 
 
Just a final piccy to show how perfect the length is. 
You can see here where the outer seam is right at the back but this will be covered by Honey's skirt. 
 
*  *  *


Wednesday, 24 April 2013

Honey is a Pink Fairy - Finished!!!

Finished Fairy Dress!!


The Final Steps!


Last time with the green fairy dress (http://www.honeyis.blogspot.com.au/2013/03/honey-is-fairy-wrap-up.html) I did a two tone skirt, but reviewing the finished product I decided I wanted to try a three tone skirt. 
 
The skirt is all chiffon and for the pink colour scheme I have chosen pastel pink, magentery hot pink and purple to go into the skirt.
* The one thing I would change about my fabric choice is I would get all the materials the same type of chiffon.  I bought the magenta fabric at the same time I got the pale pink cotton and got the other two colours much later.  They didn't have the colours in the same type of chiffon as the magenta I had already bought so the material is slightly different but not detrimentally so.   
 
 
Photos above were me playing around with which way the colours looked best.  As you can see, Honey picked the light to dark combination on the right.
 
: )


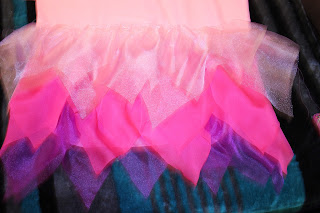
All the pretty petals cut out and laid together to get an idea of how they'll look as a finished skirt.
You can see in this shot that the original material I bought (the magenta) is not as metallic or sparkly as the other colours.  It's actually better quality, more like you would use for a formal dress.  If I did it again I would go sparkly with that too, its more suited for pretty fairies.

 
I tried it on Honey once the first layer was sewn on to check the length and make sure it was in the right spot. 
 
Honey is saying 'where's the rest of my skirt?'
 
I gathered and attached each layer individually.  It wasn't bulky like the green skirt, which was the goal, but it was very time consuming.
Honey is a fairy round 3 when I get around to it will have be sewn by colour.  So all of the pale pink will be gathered together as one bit of material and then attached to the skirt. 
This will make it a 3 layered skirt rather than 7!
Much more manageable.
 
It hung down and looked a bit daggy only attached at the top so I sewed it to the side.  The added benefits was that the skirt then belled out like a bubble which made it fuller and prettier. 
On Honey is a fairy part 3 I would consider toying with using Tulle to stand it out even more.  
 
 
The picture on the left is the view of the inside of the bubble and the picture on the right is the outside view. 
 
 
Finished skirt!!!
Was tricky to get a clear photo because of the sparkly reflective quality of the chiffon.


 Honey LOVED her fairy skirt!!!
 
There was one massive moment of disaster where I was ironing the top layer down.  I was ironing the top layer down because instead of sewing it downwards, I sewed it up so I could fold it down and it would both hide the stitches and be more fluffed up.
The problem was the iron unexpectedly spitting out a cloud of steam melting a hole in the skirt. 
 
Luckily you can't tell unless you're up close or looking at it because all the layers disguise it a little.
This is the offending hole, inconveniently front and centre but luckily fairly inconspicuous. 
 
It is a tiny bit bare with just the skirt and nothing else.  As it is a 'fairy' dress it will eventually have wings, but I need to figure oiut how to make these.  The alternative is buying child's costume wings, which do quite conveniently fit Honey.

If I did get the child wings though I wouldn't leave them with their tie on/elastic arm loops.  What I would do is sew a patch to the wings and to the costume so they could be stuck on with velcro like the christmas fairy outfit. 
 
Another bit of ornamentation I think would work nicely would be small petals around the neckline.  I would probably do these in the three colours but alternating in a single layer. 
 
I am unfortunately unable to add these bits and pieces just yet because I have a fortnight to design and create a Cinderella costume for Honey, Prince Charming for Beau and Prince Adam (Beast as a human in Beauty in the Beast) for my Husband.  I also need to organise accessories and jewellery for my Belle costume and help mum design the Belle costume. 
 
Lots to get done in such a short time.  This hectic schedule is the reason it has been a little while between posts. 
The costumes are all done now and the party done.  The costumes are a little worse for wear from playing with a staffy friend all night but they looked fantastic on the day!
 
I can't wait to share them with you.
 
: )


Wednesday, 3 April 2013

Moving forward

Moving Forward


To make things easier when checking fit, and the progress of the skirt I decided the next step should be attaching the velcro. 
This means I will be able to get the costume on and off Honey quickly and easily and also means I can step back to take a photo without it falling off at the first wriggle.


I didn't use the stick on velcro because I've found the stickiness releases before the velcro does and I want the dresses to last.
 
 
This was the first time I'd ever sewn velcro onto anything and I am pretty happy with the results!


I know I said in the last post I wouldn't post fitted shots until the skirt was on, but I'm just too pleased with it not to share! 
Chest fits Honey PERFECTLY and sits just right with the velcro!!!
Stomach strap is another success.  Sitting comfortable with enough wriggle room for Honey's boisterous antices, without hanging down!
 
On a roll now! All that's left is the skirt!!