Sunday, 23 June 2013

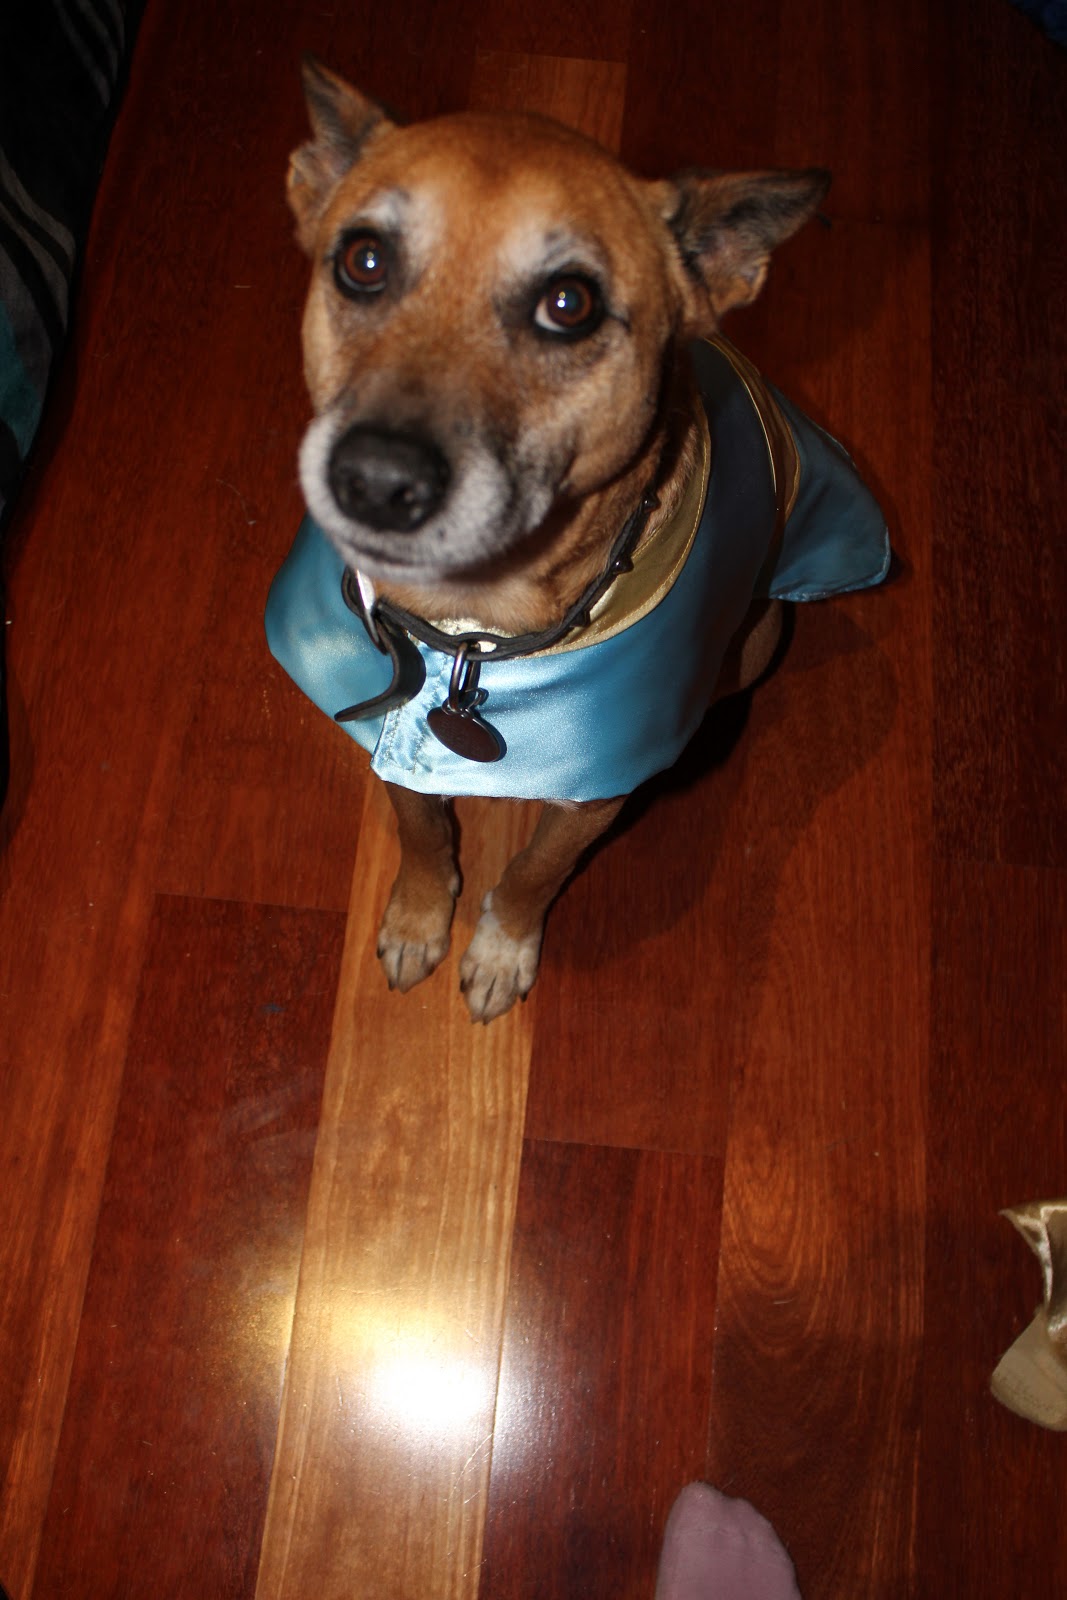
Honey and Beau - Cinderella and Prince Charming final photos!

Honey and Beau as Cinderella and Prince Charming!

The outfits are all finished now and had a fantastic response at the Disney party!
Everyone loved them and thought they were adorable and fantastic.
 
I also want to take this moment to mention that I only use an everyday standard sewing machine.  There are no gadgets or fancy bits or even an overlocker, although one day I would love an embroidery machine.
 
Anyone can sew, and it can look awesome!
You don't need the best of the best wizbang sewing machine to achieve a professional look, just a bit of patience and practice.
 
 Beau doing his best impression of Prince Charming.
Since the party, little Beau has put on some weight.  Trying the costume on I noticed it was a little tight in places.  Poor little guy will have to go back on his diet.
 
Honey being a princess in her super poofy skirt! I love how big this skirt turned out, it really does remind me of a ball gown and looks spectacular on.
The only thing that bothers me about the Cinderella costume is the chiffon ovals.  They were lightly stitched together and that helped to hold them in place, but a rough night of play with all the dogs resulted in a bit of fraying which weakened the bond.
Now that they are loose they do tend to flop forward, which on the whole is not too detrimental, just not how I wanted it.  If I did another Cinderella costume I would put a few subtle hand stitches connecting the chiffon directly to the dress.
I'll also put this change in place on the current costume for next time she goes out dressed as Cinderella.
The prince and princess posing together.
: )
 Beau loves his Honey!
 I will just mention, for those of you who are concerned about Honey's red eyes, they are the result of allergies.  Because of this she does have good days and bad days, depending on season and weather as anyone with hayfever or similar allergies can attest.
Honey doesn't sneeze with all the pollen and fresh cut grass around but her eyes do get quite red looking.
Although it can look quite confronting be assured Honey is not slowed down by these allergies, she can still see perfectly and they don't seem to hurt her.  Even on her worst days, Honey is always keen to play and is completely herself in every way!
Beau's outfit is definitely my favourite costume so far.  It was challenging because it does have quite a few new techniques for me and I had to completely redesign the pattern, but I think the extra effort was well worth it with the finished product.
There is nothing I would change on the design of Beau's costume.  The only changes I would make would be in my method.
I had some difficulty with the coat tails as I mentioned in an earlier post, and ended up folding the seams under and sewing on the outside.  I have since managed to work it so I could hide both the seam and the stitching.  I thoroughly blame sewing into the wee hours of the night for not coming up with the solution at the time.
The only other adjustment would be sewing the edging further onto the epaulettes to make them more resistant to playful Staffies with sharp teeth!
(The right one has been pulled out from under the edging, but is easily repaired.)


Honey and Beau posing as regal monarchs. 
(Beau was a bit of a sleepy monarch)
 
Overall I am much happier with these outfits than any predecessors and I hope this is a trend that continues as my sewing and design skills progress.
Both costumes could be made in any size so if you are interested in having your own Prince Charming or Cinderella don't hesitate to email honeyis@bigpond.com or niki.turner@bigpond.com.
Hope everyone is enjoying seeing the new outfits as much as I enjoy making them.
:)
 

Wednesday, 12 June 2013

Beau is Prince Charming -Part 3

Beau is Prince Charming

Decorating

A golden collar is a must for every handsome prince.  I cut this piece out and hemmed it up quite quickly.
The seam allowance from the pattern to the hemmed costume made a bigger difference than I expected and I had to cut the ends down a fair bit (more than I expected).
 I folded the raw ends under and used the stitching to hold them down to hold them hemming in place as well.
 

Photo above shows the costume laid out with the collar sewn down and the velcro pinned down ready to be sewn in place.  In the previous post I showed the velcro pinned down without the collar but I remembered in time that the collar would have to go down first otherwise it would get in the way of the velcro. 
Beau got to have a little photoshoot trying the outfit on before the belt was in place, but all he wanted to do was sleep!
 
Beau is just tooo cute!

Belt is all attached and you can see it quite neatly covers up the seam attaching the maroon to the blue.
The gold belt is what holds this outfit in place.  Normally in the Honey outfits the belly strap is alot wider and further forward, tucking just behind the front legs. 
Instead, for this outfit I wanted the golden belt to sit further back so it sits almost where a real belt would be.  I made it narrower than the belly straps I normally make on Honey's outfits to make it more belt-like.
The smaller surface area of the velcro didn't significantly affect the costumes ability to stay on and despite some rough play with Honey and a friends staffy, Beau's outfit stayed on the best out of all the dogs (and better than some of the humans!)
 
The epaulettes were the last bit of decoration to be added.
They were fairly straight forward, half an oval cut out with a small amount of extra material on the straight edge for the seam allowance.
I didn't do the seam before attaching the epaulette.  Instead I folded the seam under the epaulette and then attached the epaulette, making sure to go over the seam, hemming and attaching in one go.
 
I then got this fancy bit of edging which I found in the ribbons and lace section and pinned it around the outside of the epaulette, overlapping a little so the epaulette will be sewn beneath the edging. 

Final photos in the next blog post showing Beau in all his Prince Charming glory and a wrap up of both Cinderella and Prince Charming costumes.


Saturday, 25 May 2013

Beau is Prince Charming Part 2

Beau is Prince Charming

Part 2

Thought I'd start this post off with a photo showing the seams from underneath, ironed and folded back so they'll sit flush against Beau.
 
 
Once the lower side was sewn together and ironed I lined up the maroon on the top half so it would match the maroon on the lower.  It doesn't lie at the end of the blue like the lower half because I created a feaux jacket out of the blue.
 
I blame sewing until 3am most nights and getting up early to ride and get everything done during the day but I really struggled with the feaux jacket tails.  I just couldn't get the lining to come out right so that the stitched were concealed and it was safely tucked right way onto the jacket. 
I have since conquered this problem but my foggy middle of the night solution was to painstakingly hem both pieces and pin them together and sew them from the outside. 
 
Not as pretty as the desired effect and took forever! But on the positive I did manage to keep the stitches fairly neat and it doesn't look too bad. 
 
 
The above pic shows the off the feaux jacket tails and the start of the decorations.
 
I have also jumped ahead a bit.  Before starting on the decorations I sewed the the upper and lower layers together inside out to conceal the seams, leaving a gap at the tail as per usual.
I then turned it right way out, re-ironed it to get the edges crisp and pinned the velcro in place.
 
Don't worry too much about the stitches you can see connecting the maroon to the blue, they will be mostly concealed by the belt once its in place.
 
To secure the ribbon in place I ran stitching down either side of the ribbon.  I didn't want it to fold up and flap if I sewed down the middle, and I also didn't want the stitching to be too obvious so I concealed it in the darker edging of the ribbon.
 
I am quite proud of how well that worked and how straight the stitching is!
 
Here's a sneak peak at the underside so you can see the stitching.
This photo also shows the thick sections where I have gone back when sewing to secure the stitches at either end.
 
 
The gold bit in the middle of the outfit was painstakingly hand sewn on!  It is a fairly fancy connecter like a button but cooler.
Theres a bauble in the center of it which hooks through a circle in the design securing it closed.  I sewing it down securely so it won't come apart. It's not meant to be functional in any way, I just thought it made a great bit of decoration and fitted in with the outfit perfectly.
 
: )
 

Tuesday, 14 May 2013

Beau is Prince Charming

Beau is Prince Charming!

Part 1

Beau has always been a prince charming so I was really looking forward to create an outfit that would see him look the part!
 
I also wanted to branch out and do something a bit different and trickier than all the other costumes.
 
I'm not sure who originally put this picture together, (so if it's yours let me know and I will credit it to you) but I love how well it shows both outfits.
 
The key things for me that say Prince Charming is the maroon pants with gold striping, pale blue jacket, gold belt and epaulettes.
 
Thats alot to squish on one little furry human! Especially since he doesn't wear pants.
 
What I decided to do is make it look like there is a jacket over a lower maroon layer.
This involved a new pattern and LOTS of bits and pieces!!!
Bottom left is the main outline, the finished size of the outfit.
The upside-down 'u' shape is a decorative bit for the collar.  The piece above that is the back side of the coat tails which makes it appear a seperate outfit.  Above that is the belt.  To the right is the maroon section, it is the only piece that is the same for both the upper and lower parts.
Top left is the upper side of the pale blue and top right is the lower.
 

When I cut the pieces out I always pin the pattern down so it can't move.  It is especially important in this outfit that care is taken when cutting and sewing the pieces because the upper and lower sides need to match up.
In all previous outfits they have been cut out at the same time from one bit of material folded in two, making them identical from the start. This pattern involves patching lots of different bits together and trying to line them all up.
Trickier than it sounds.
 
This is the lower layer all pinned up ready to be put together.  I started with the underside as it was the easier of the two since it only has two pieced to connect. 
An added element of difficulty is that I am connecting two different types of materials.  The lower maroon half is cotton, while the upper section is satin. 
I thought the cotton would be a better material for pants if it were really a pants jacket combo and it also prevented the outfit from being too shiny and over the top.
To avoid the cotton slipping off the satin and making the outfit uneven, I put LOTS of pins in. My rule of thumb was at least one pin every two finger widths.
 
 
This is what it looks like right side out, all stitched up and ironed flat.  When I ironed the seams I folded them out so each colour was sitting back on itself and pressed them down with the iron so they will sit flat inside the outfit. 
The ironing isn't just important for making it look nice.  It makes sure the outfit doesn't have any folds or creases so it will stretch out to its full size and match the corresponding piece.  If it had a crease it may warp the shape or not be big enough to connect comfortably with a seam allowance.
As I learned with the fairy outfit you just have to be really careful that you don't have the iron set to steam or too hot if you're working with delicate fabrics like chiffon.  Most irons have their temperature settings in material type these days.  Always set it to the least robust fabric you're using.
Because I connected satin to cotton, I set the iron to satin.


Wednesday, 8 May 2013

Honey is Cinderella - Final Touches

Honey is a Cinderella

Final Touches


Having made sure all that awsome tulle is nice and perky and standing up well, the first thing I have to do is pin it back down so I can get the satin on without all the tulle getting in the way!
 

The satin has been pinned and will be sewn on upwards to hide the stitches. 
  
 
There are two long strips of chiffon in a tear shape with rounded ends beneath the satin, which will be sewn with the same stitches that hold the satin in place.
 
 
The above photo is still just pinned in place, but I folded the satin down so the chiffon can be seen.
 
 
 The satin and chiffon has been sewn on in the above two shots, but I have left the tulle pinned down for now incase I have to make any changes.

Honey LOVED trying the outfit on.  Her and Beau even did their best impression of regal poses, practising for their roles as Cinderella and Prince Charming.
Again this doesn't show the skirt's tulle-enhanced ball-gown awsomeness since the tulle is still pinned down incase of adjustments.
 
Lucky I did because I wasn't entirely happy with how the skirt sat.  I could see that even with the tulle puffed out it was going to be a little droopy looking with the corners hanging down.
 
To fix it I used a trick I learnt with the fairy dress and sewed the skirt for a short way along the line of the underjacket. 
  
Not having it hanging down also means there will be less weight on the tulle so the skirt will stand up better when complete.
This was the result once the tulle was unpinned.
A beautiful ball of a dress, just like a human ball gown.
 
The only problem is the chiffon bits.  They are a little hard to see but if you look carefully you can see the one closest to us hanging down just in front of the skirt.
 
The first thing I tried to do to fix it was putting a small stitch in both tear drops to keep them centred and together but the weight of them dragged them forward off the skirt and they still hung down.
 
In the end I decided to cut off the long tear drop ends which had been intended to follow the line of the skirt.  Now that the skirt doesn't hang down anymore it just wasn't necessary to have them long.
I cut the new ends into a rounded shape making the chiffon into ovals rather than tear drops.
This design fits closer to the original inspiration now that the skirt is higher and doesn't hang down and combined with the dart worked perfectly to fix the problem.
 
I had intended to get a final awsome picture on the night of her with Beau and Mark and I but due to the state of the people taking the photos on the nigth they didn't turn out. 
I will take some nice photos of the complete outfit and add them to this post later.
Both costumes are a little worse for wear due to a rough night playing with each other and a boisterous staffy.
 
This dress design would be very versatile and doesn't need to be confined to a Cinderella theme.  It could be made up in any colour, with or without the chiffon ovals to give your furry human a pretty satin dress.
There are plenty of dog tuxedos on the market for a handsome boy dog to wear to a wedding but not many formal dresses.
If anyone was interested in having a special four legged girl accompany them down the aisle or just be a guest of honour at a special occasion I could alter it to match a bridal gown or be in the bridesmaids colours.
 
Any requests can be made to honeyis@bigpond.com or niki.turner@bigpond.com.
 
: )
 

Tuesday, 30 April 2013

Honey is Cinderella - Part 2

Honey is a Cinderella

Part 2!

 
After putting together the main part of the outfit, the next thing to do is to start designing the skirt.
 
 
Honey's costume is 70cm wide. I made the fabric associated with the skirt double that so I can gather the material and give the skirt more oomph.
I also made it longer than it needed to be to allow for all the extra volume of skirt since its going to be standing out like a ballgown!
 
Before I could do anything else I did need to hem all around the satin skirt so it wouldn't fray and get tatty looking.


Depending on what I am doing I tend to allow between 0.5cm (5mm) and 1cm (10ml) for seams.
 
The key to getting the skirt to stand out from Honey is tulle!!!
 
 
Both tulle strips are 140cm wide and get gathered to around 60 cm.
Took this photo to show the difference with before and after gathering!
The pic also shows the two layers of stitching which are required for strength when gathering.
 
There is 5 cm of difference between the two strips in length.  The top strip(when attached) is the shorter to allow the skirt to stand out in a big ball.
 
 
All pinned up and ready to be sewn in place. 
 
 
The reason the tulle is getting sewn up towards the neck is to help it stand up more.  It will be folded back towards the tail and held down a bit by the weight of the satin.
 
 
The lower one was sewn on first and then the shorter, upper layer. 
 
Honey 'helping'.
 
Both layers of tulle are now on and standing up by themselves without a problem. 
They won't be quite as perky once the satins on, but with the amount of gathering in them they should retain the majority of their uprightness.
 
: )


Honey is Cinderella!

Honey is Cinderella

Part 1


My housewarming theme was Disney! I couldn't have a dressup party at home without the puppies getting involved!!!
 
Honey and Beau went as Cinderella and Prince Charming.


This was Honey's inspiration.  Blue with a full skirt and paler blue foofy bits on the hip. 
 
I decided to brave satin for this outfit despite how convenient and easy cotton was to work with.  What's a princess without a big shiny dress.
 
The basic outline of the outfit was quite quick and easy because I already had the pattern from Honey's fairy dress.  I trimmed the paper pattern down to match the adjustments I made in fitting the fairy dress so I didn't have to change the satin in case it was harder to work with. 
 
 
I was especially worried that the satin would be slippery while it was face to face for the main sewing so I had TONS of pins to make sure it didn't even wriggle! 
Whether it was the pins or just that satin was not as scary as it looked to sew, it was actually no harder than the cotton to work with. 
I believe part of it was that I was sewing two pieces of the same type of fabric together and another factor was the lack of stretch in the satin. 
 
Like with the other costumes, I sewed around the outside leaving a gap at the tail end to turn it out the right way.
 
 
I encountered a problem with the satin pulling in and bunching in the corners. 
 
 
My mum recommended turning the outfit inside out again and making little cuts in the corners, every 2 - 3 cm, stopping just short of the stiches.
If you look closely at the above picture you can just see the snippets. 

 
This above photo is after the cuts.  It is not perfect but is much improved!
 
After getting all the seams done I quickly added the velcro so Honey could try it on!  
 
 
Tested the fit and it is perfect! Loving the look of the satin! Its so smooth and shiny.
Very princessy!
 
 
Just a final piccy to show how perfect the length is. 
You can see here where the outer seam is right at the back but this will be covered by Honey's skirt. 
 
*  *  *